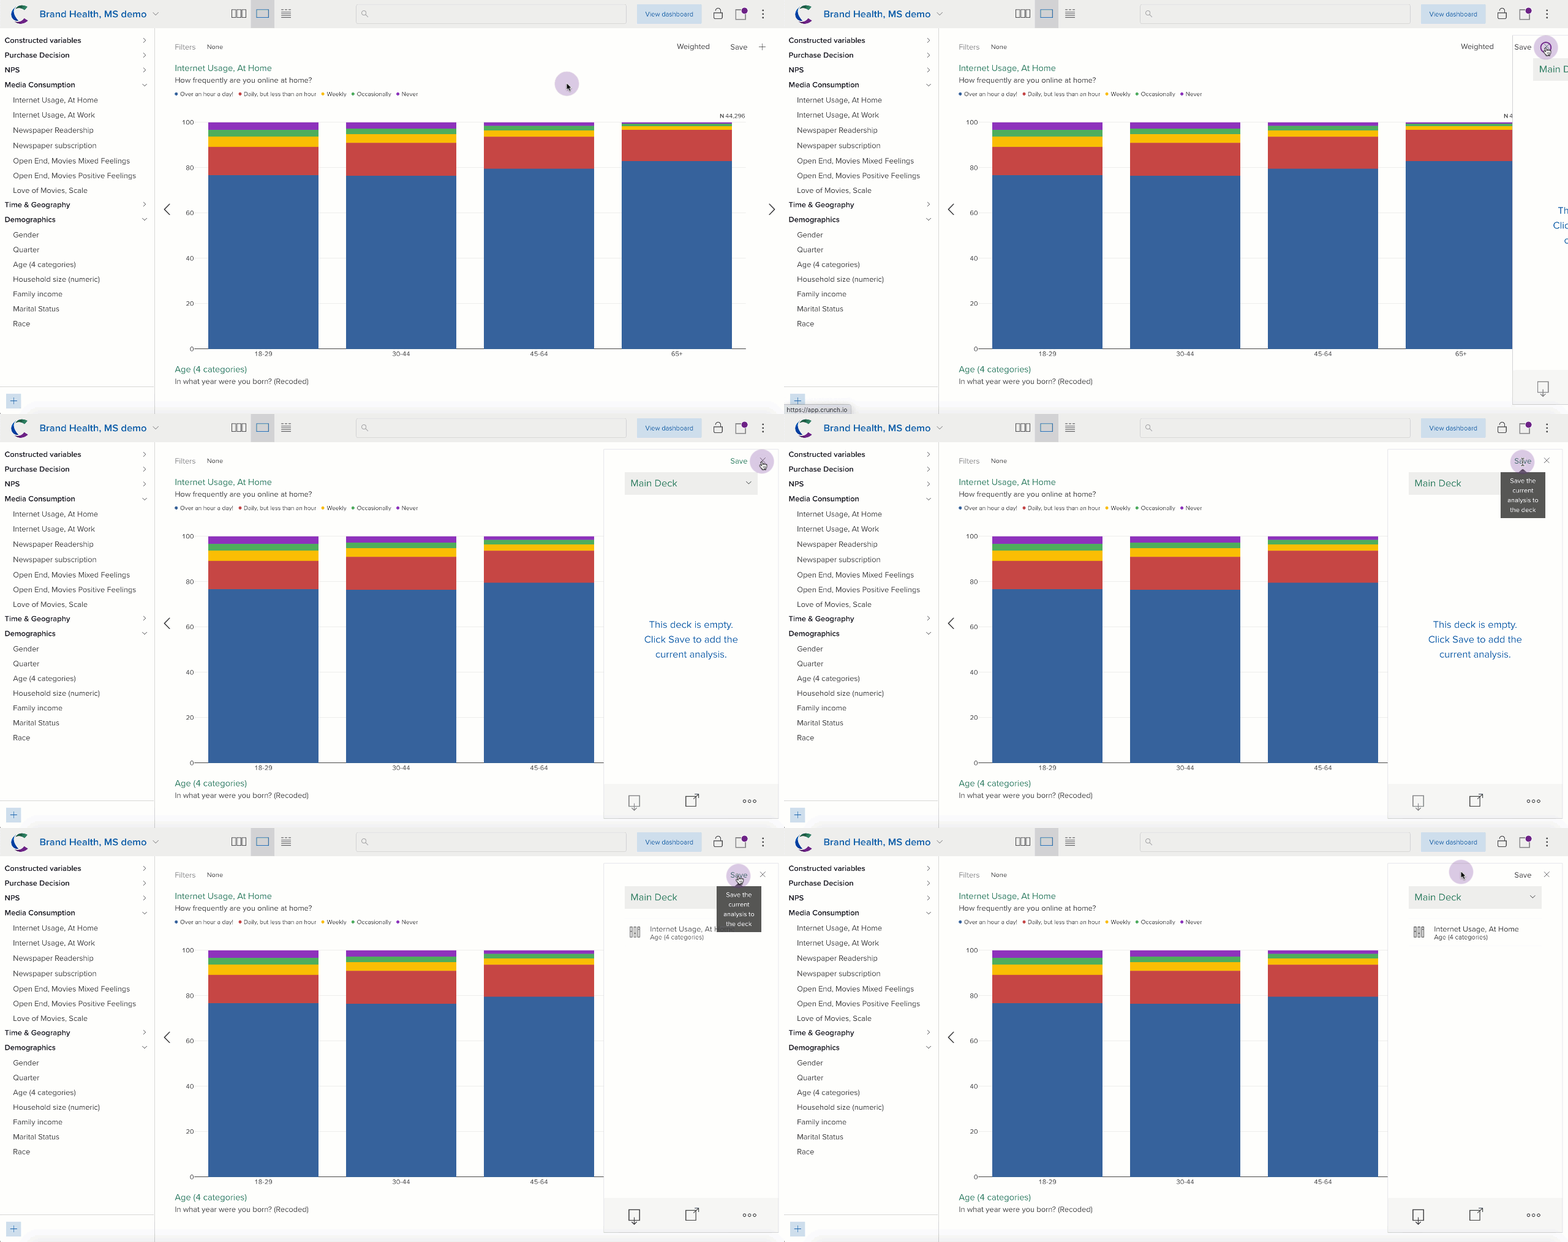
The deck is an essential part of the Crunch workflow. It is the panel that opens on the right-hand side.
The deck lets you:
- save an analysis to come back to later (like a bookmark)
- prepare your analysis for export (ie: customize the look and what's shown)
- export to PowerPoint and Excel (as editable charts)
- create a dashboard (the deck and dashboard are inextricably linked)
In the next section, we covered exporting to PowerPoint and dashboarding. In this article, we cover the basics of saving analyses to a deck and organizing them.
How to save to a deck

In the upper right corner, click the + (next to Save). When we do that, the deck panel on the right-side slides open.
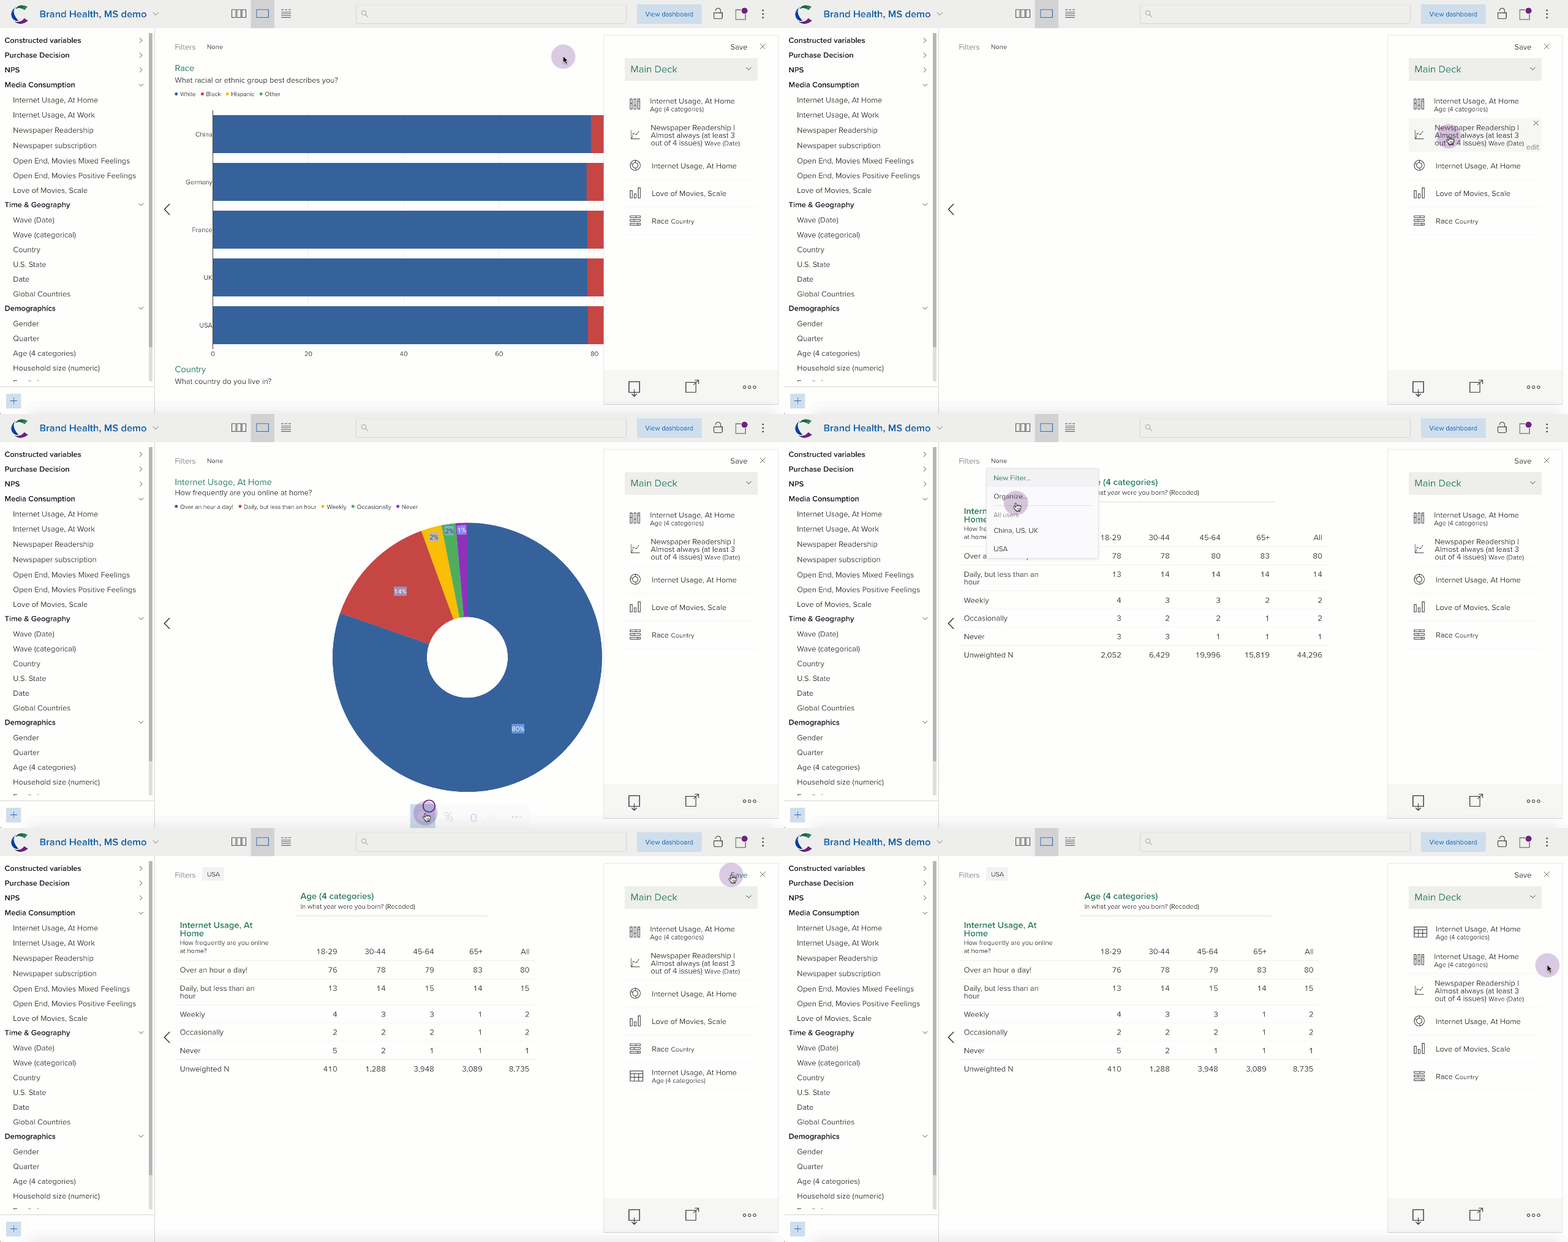
Anytime you click Save it will save an analysis to the deck. Each analysis is its own slide. (A slide corresponds to one slide in a PowerPoint report and/or one tile on a dashboard).

Whenever you change the analysis in the main area, it will save that particular analysis to the end of the deck (including whatever filter or weight is applied). You can reorder the slides in your deck with drag-and-drop.
The different icons in the deck indicate whether it is a table or a particular type of chart.
The slide remembers the filter or weight you had applied at the time you saved it. So different slides can have different filters and weights.
Making additional decks
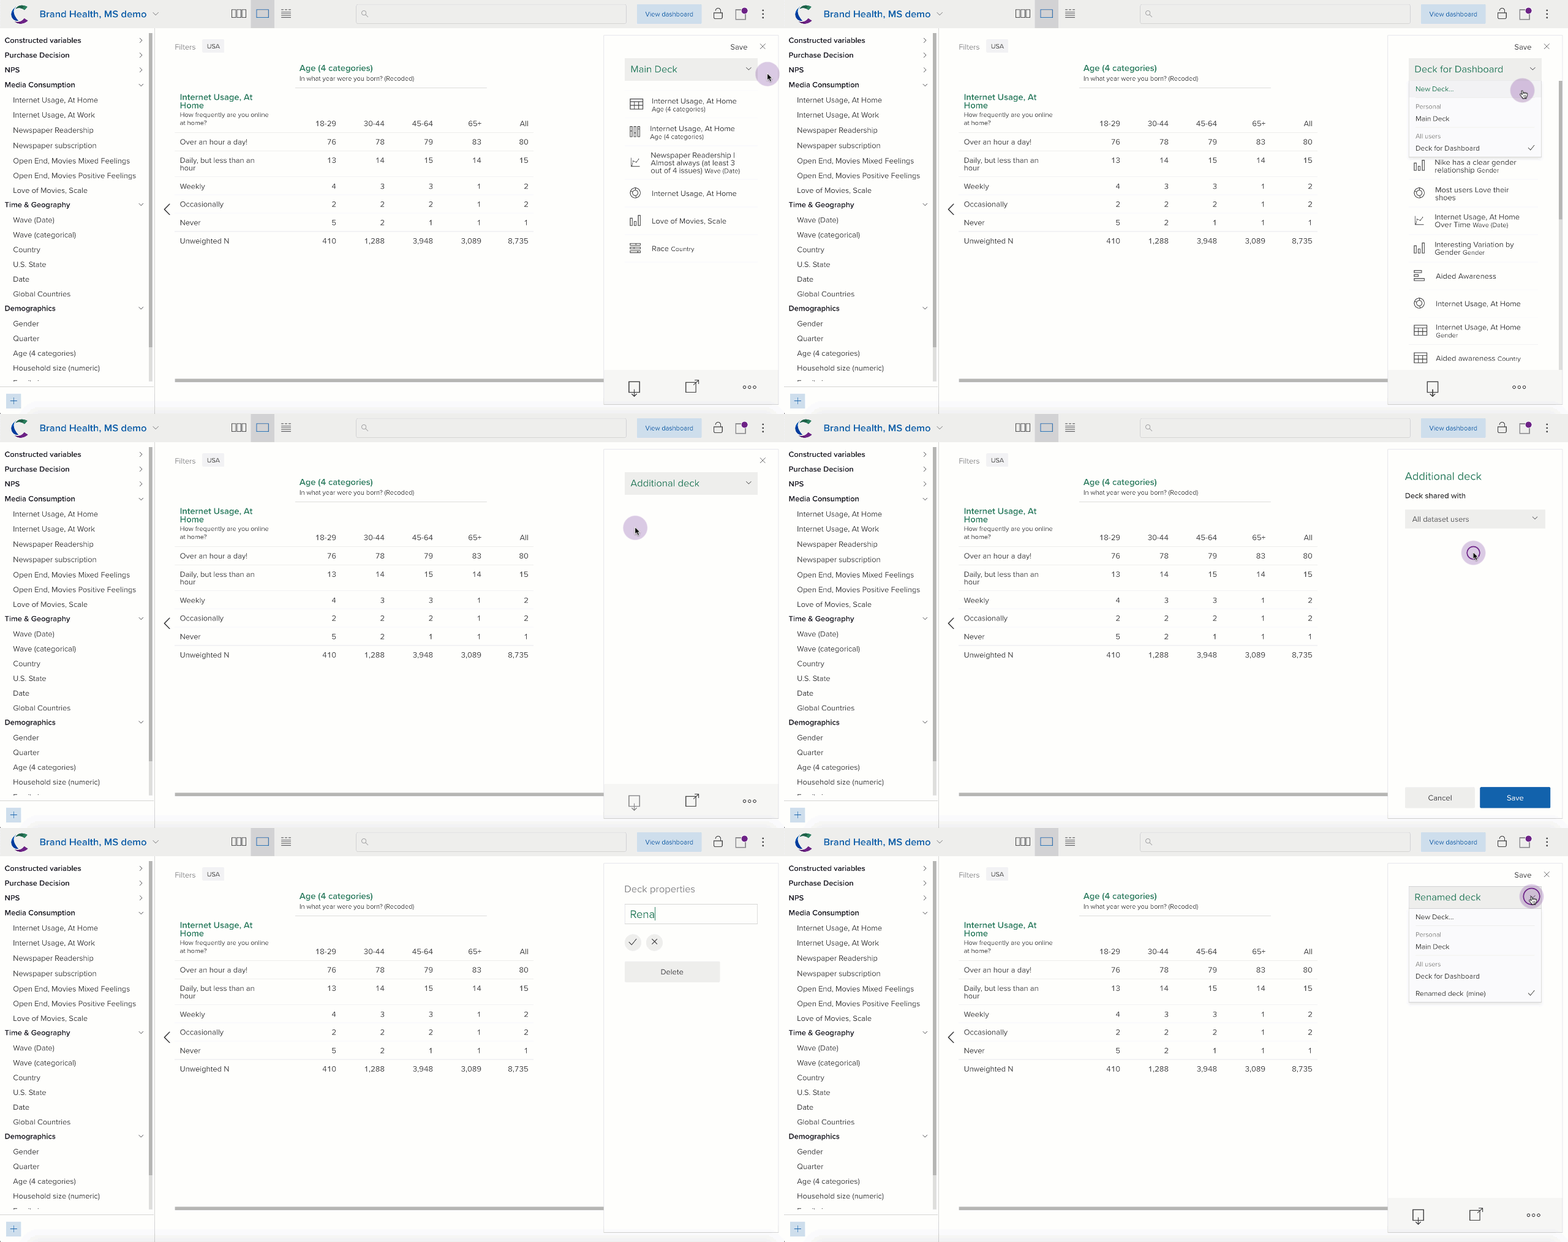
You can make as many decks as you want to store additional analyses. These can either be public (shared) or private (just for you). You can also rename your decks and change the shared settings.

To change sharing properties, go to the share button at the bottom of the deck.
To change the name of deck, or delete one, go to the three dot button at the bottom right of the deck.